I haven't been keeping up on my blog lately (or projects in general until recently), but I have a good reason! For the past year and some change I've been working hard on projects and learning as much about development as I can with the intent of finding a development job to start my programming career. After a lot of studying I felt I was ready and started applying around. One of the resources I used, in addition to LinkedIn and job posting sites, was Hired.com.
Hired.com is a recruiting platform that focuses on providing experienced and capable developers, who qualify through Hired's testing and screening process, a recruiter and a large selection of companies to be exposed to. The idea is that after setting up your page and having your recruiter improve it, they open your page for a short duration to hiring companies and actively promote you. Upon finding an interested company, an offer by the company will be made and you begin the interview process with them.
After going through a couple companies, I was matched up with Frontline Technologies that, after interviewing with, gave me an offer and a great opportunity in Chicago. I took it and started working there back in September. So far, I feel very fortunate to have gotten this job. The company has a management approach called "servant leadership", meaning that management exists to support its employees, and the company focuses very hard on the happiness of its employees as a means to increasing productivity. I'm very happy with my job and my co-workers are great; I am very lucky.
While I began working there using .NET and Visual Basic on one of their web applications (SaaS), I was able to be put on a greenfield project implementing web APIs for the backend of a new web app using Web Api 2 (C#) for ASP.NET. So far things are going great, and my team is an amazing group of developers. I have a lot to learn, and thankfully my teammates have been very helpful in that regard.
On the side I've been studying mostly front-end technologies included JavaScript and CSS (and Compass/Sass). I've also been learning MongoDB and Node.js for back-end. Additionally, a few weeks ago I started a new project called RedditBoost, which is a Chome web browser extension that enhances Reddit (with features including hover image/gif preview, user tagging, blocking of users for comments or links, hiding subreddits on the frontpage, and some other features planned).
Overall my skill as a developer has skyrocketed since I started my new job and it's exciting to see how much I can do now. I can't wait to see what I learn and accomplish in the future.
Sunday, December 20, 2015
Sunday, December 13, 2015
Tutorial - Creating a Chrome extension with automatic script injection
Recently I started working on a Chrome extension for Reddit (which you can find here), and I hit a bit of a snag as far as getting it started. After some googling and random stack overflow pages, I was able to get going, but for those who just want to skip the homework, below is a quick guide to get you going.
The goal is to setup a Chrome extension that will, on every page, inject and run your JavaScript (which in this case, will make every page's background red).
The goal is to setup a Chrome extension that will, on every page, inject and run your JavaScript (which in this case, will make every page's background red).
- First, setup a directory and create some empty text files named "onLoad.js", "manifest.json", and "script.js".
- The manifest.json file is the configuration for your chrome extension. The following manifest is setup to load your script, "onLoad.js", on all pages. The injected script is "script.js", and it is added to "web_accessible_resources" so that it's allowed to be used. Finally, make sure to use manifest_version 2, which is the latest version (1 is deprecated).
- onLoad.js is loaded on every page, but unfortunately it lives in a separate area than the actual page. We want to actually inject, or embed, script right into web page. That way we can directly access elements and have the injected script behave as if it is a native part of the page. We do this by telling onLoad.js to find and insert our JavaScript file right into the current page on every page load.
- We're almost done, all that's left is to define our script and load the extension into Chrome. For now we'll do something simple; we will change the background of every page to red.
- Finally, lets install and test this extension. Follow the following steps.
- In Chrome, go to Settings->Extensions
- Check the "Developer mode" checkbox
- Click "Load unpacked extension..."
- Select your extension's folder and press OK
- After you are done testing, to disable, either uncheck the "Enabled" checkbox or click the trash can to permanently remove it
- Now that the extension is loaded, go to google.com and see the background change to red. Good job!

Saturday, August 22, 2015
Camping and Website Authentication
Just got back from vacation and had a great time. We traveled up to Traverse City to see my Grandma and cousin; then stopped by Mackinac Island with our bikes to stay the night; then finally arrived at our destination in Tahquamenon Falls to spend the rest of the week camping with my dad, sisters, and brother-in-law.
After getting back home, I finally got around to adding authentication to my website (salgat.net/Manager). While ASP.NET comes with several forms of authentication support built in, I decided to do it the old fashioned way as a quick learning experience.
Implementing authentication was done using both the Session state and a User SQL table. The table has a UserName, Salt, Hashed (Password+Salt), and Authentication Level stored. When the user goes to the Manager webpage, if they are not authenticated, they are sent to the Login page. In the login page, they submit a username and password, where the username is found in the table, its corresponding salt is found and appended to the provided password, and that value is hashed and compared against the stored hash value. If they both match, the Session collection is updated with the UserName and Authentication level. When the user tries to access any protected pages, the Authentication level stored in Session is checked, and if it fails, the user is redirected to the login page.
 |
| Login page located at www.salgat.net/Manager/Login.aspx |
The purpose of not storing the raw password in the database is to prevent a database breach from resulting in user's passwords being visible to the hackers, which, while not very helpful for security of your own website, prevents a user's username/password from being used on other websites. The salt is used as a way to prevent rainbow tables from allowing for easy password lookups on the database, since the hacker would have to create unique rainbow tables for each user.
As a final note, it should go without saying that doing any of this is a really bad idea unless you know exactly what you are doing. Security is an extremely serious topic and, unless you are an expert, should not be done in any serious setting. Additionally, any security related programming should be regularly audited by a third party security company/consultant.
Sunday, August 9, 2015
Update to ASP.NET
Last month I updated my website (mostly to present my projects better). The upgrade included using a free template I found online and then manually creating each page in HTML. The result looked alright but it was a pain to change most of the pages. If I wanted to add a new page, I had to update all the pages with the added link in the header. Or, if I wanted to insert a new project, I had to update the project index present at the bottom of all the project pages. Worse yet, it was very easy for one mistake to occur in all the copy and pasting.
I decided to upgrade to an ASP.NET Web App. The first step was finding all the common elements between each page and moving them to a single Master Page. The beauty of this is that if I need to add a new page to the navigation bar, I simply update the Master Page. Additionally, the projects directory has its own Master Page nested inside the main website's Master Page. It programmatically generates the project directory present at the bottom of each project page which makes things so much easier to update.

Finally, I was able to migrate to Microsoft's Azure web hosting platform. Previously, I had been using Dreamhost's VPS and a simple apache server that pointed to a root directory containing my static website. Now, the website is dynamically generated and updating the website is as easy as clicking the "Publish" button in Visual Studio.
As a final note, I decided to have a little fun with the site and added an web site manager page located at http://www.salgat.net/Manager/. It's nothing fancy, but I added a view count tracker using a SQL database that holds a ViewCount entry that is incremented every time a new session is started. I don't actually care much about this (I'm sure most of the views are just web crawlers anyways) but it's a great chance to learn more. I think from here I'm going to add a login for the page and do things like have a table of unique IPs stored with a view count associated with each IP. What's nice is that I'm using the Azure hosting platform again for hosting the database. I was pretty impressed with the pricing, as the combined cost of the web app hosting and database hosting is roughly the same as a VPS with Dreamhost, which means I'll drop Dreamhost's VPS hosting altogether and just use it as a domain provider.
For those who want to check out the progress, I have the project hosted on GitHub. I made sure to use .gitignore for things like Web.config to prevent secure information (database password) from being released.
https://github.com/Salgat/Personal-Website
Monday, July 27, 2015
Entering the .NET world
At this point, I'd say my C++ proficiency is at a point where I can confidently state that I am "decent" at it, and by that I mean I can fumble my way through it! But in all seriousness, I've utilized several different aspects of C++, from parallelism/concurrency, to memory management, to graphical display, and so on, with several years of experience, to where I can say that I feel comfortable using it now. I still very much am a beginner, in that I have so much more to learn, but at least now I can manage to not be completely lost whenever I come across a C++ article or blog post covering an interesting facet of the language.
Over the past month I've been reading up on C# and the .NET framework. Along the way, I wrote a script for the LeagueSharp League of Legends bot and recently started another project. In the above picture, you can see what the program looks like. To use, go to File->Open and select the image you want to see, and then use the buttons to see other images in the folder.
PreviewLite Github: https://github.com/Salgat/PreviewLite
It's a very simple program, but I wanted to start out with something simple to get my feet wet. I don't expect to invest too much time learning Windows Presentation Foundation (it's easy to get into, but with a lot of features if you want to invest the time learning), as my interest lies more in back-end development, specifically ASP.NET. I've been reading Pro C# 5.0 and the .NET 4.5 Framework and am getting close to finishing in the next week or two. The book covers most of what C# has to offer, including the major components of the .NET framework, including ADO.NET and ASP.NET.
From what I've read, I'm really liking the Entity Framework, which provides a way to use objects that seamlessly translate into database entries, to create easy to use and persistent objects in your program. This is in contrast to traditional database APIs that require you to manually define the tables and their entries. I was able to follow a Microsoft tutorial to create a basic ASP.NET based web store that used Entities for its products, and was pleasantly surprised at how simple it is. I'm excited to learn more and have another idea for my next C# project!
P.S. I gave my website a recent face-lift, so check it out! http://www.salgat.net/
 |
| PreviewLite, a simple image viewer for Windows using C# and Windows Presentation Foundation (WPF). |
Over the past month I've been reading up on C# and the .NET framework. Along the way, I wrote a script for the LeagueSharp League of Legends bot and recently started another project. In the above picture, you can see what the program looks like. To use, go to File->Open and select the image you want to see, and then use the buttons to see other images in the folder.
PreviewLite Github: https://github.com/Salgat/PreviewLite
It's a very simple program, but I wanted to start out with something simple to get my feet wet. I don't expect to invest too much time learning Windows Presentation Foundation (it's easy to get into, but with a lot of features if you want to invest the time learning), as my interest lies more in back-end development, specifically ASP.NET. I've been reading Pro C# 5.0 and the .NET 4.5 Framework and am getting close to finishing in the next week or two. The book covers most of what C# has to offer, including the major components of the .NET framework, including ADO.NET and ASP.NET.
From what I've read, I'm really liking the Entity Framework, which provides a way to use objects that seamlessly translate into database entries, to create easy to use and persistent objects in your program. This is in contrast to traditional database APIs that require you to manually define the tables and their entries. I was able to follow a Microsoft tutorial to create a basic ASP.NET based web store that used Entities for its products, and was pleasantly surprised at how simple it is. I'm excited to learn more and have another idea for my next C# project!
P.S. I gave my website a recent face-lift, so check it out! http://www.salgat.net/
Sunday, July 5, 2015
Game Boy Emulator: Project Update
I'm excited to announce two big things! First, the emulator can now play most Game Boy games with minimal issues! Secondly, the emulator is now open source on github! Go check it out at the following link,
Github Repository: https://github.com/Salgat/GameBoyEmulator-GBS


Above are some screenshots of the emulator in action (The Legend of Zelda: Link's Awakening, Pokemon Red, and Super Mario Land 2: 6 Golden Coins). As of now two apparent issues occur: First, upon first starting the game, graphical glitches occur. Second, the timing is off which is most obvious with the scanline, which is out of sync and causes a slight graphical glitch. While the instruction test ROM works fine, the instruction timing ROM fails.


Additionally, even basic interface features are missing. The big issue that was holding me up for the past week was an issue where some games would randomly crash when trying to load a new section of the game. When checking the logger for my emulator and comparing the assembly instructions and memory state against BGB's emulator output, I was finding that the ROM was reading from the wrong memory bank. Unfortunately, nothing in the memory bank controller code looked wrong. I ended up having to log the entire output of the emulator up to the point of the crash, which included the register data, program counter, and some other relevant data, and stepping through BGB's emulator, instruction by instruction, until I could find the discrepancy which took about an hour to do. Eventually, I saw a point where the vertical blanking interrupt vector would trigger and set the wrong memory bank. It was only for a few instructions and not something I expected, but when the LCD is disabled, the current horizontal line stops incrementing. This isn't in any of the documentation I came across, so I'm guessing it's just assumed that you would know this. Unfortunately, I didn't make the assumption but thankfully the problem is now fixed.
While there is still a lot more work to be done (including adding more memory controller support), I'm glad to say that the emulator works on most of the games and works well! It's awesome seeing my favorite games from my childhood running in my own homegrown emulator.
Github Repository: https://github.com/Salgat/GameBoyEmulator-GBS
Above are some screenshots of the emulator in action (The Legend of Zelda: Link's Awakening, Pokemon Red, and Super Mario Land 2: 6 Golden Coins). As of now two apparent issues occur: First, upon first starting the game, graphical glitches occur. Second, the timing is off which is most obvious with the scanline, which is out of sync and causes a slight graphical glitch. While the instruction test ROM works fine, the instruction timing ROM fails.
Additionally, even basic interface features are missing. The big issue that was holding me up for the past week was an issue where some games would randomly crash when trying to load a new section of the game. When checking the logger for my emulator and comparing the assembly instructions and memory state against BGB's emulator output, I was finding that the ROM was reading from the wrong memory bank. Unfortunately, nothing in the memory bank controller code looked wrong. I ended up having to log the entire output of the emulator up to the point of the crash, which included the register data, program counter, and some other relevant data, and stepping through BGB's emulator, instruction by instruction, until I could find the discrepancy which took about an hour to do. Eventually, I saw a point where the vertical blanking interrupt vector would trigger and set the wrong memory bank. It was only for a few instructions and not something I expected, but when the LCD is disabled, the current horizontal line stops incrementing. This isn't in any of the documentation I came across, so I'm guessing it's just assumed that you would know this. Unfortunately, I didn't make the assumption but thankfully the problem is now fixed.
While there is still a lot more work to be done (including adding more memory controller support), I'm glad to say that the emulator works on most of the games and works well! It's awesome seeing my favorite games from my childhood running in my own homegrown emulator.
Sunday, June 28, 2015
Game Boy Emulator Update
 |
| Tetris running on the emulator, showing the graphical glitch it has with sprites. |
On week 3 of this project, and am excited to say that the Game Boy Emulator can now play *some* games! As of now it is only failing for the "HALT" instruction, with all other instructions passing Blargg's CPU instruction tests. Additionally, rendering of the background, window (untested), and sprites are implemented. The above picture shows the one problem with sprite rendering for now: Sprites do not render on the bottom 16 pixels of the screen and worse yet they sometimes render a bit funny. With the current progress of the emulator, you are able to play Tetris, which is pretty awesome considering this is not just my first game that works on the emulator, but was also the first game I received when my Dad gave me my Game Boy over 15 years ago.
Monday, June 22, 2015
New Project: Game Boy Emulator
 |
| Game Boy Emulator running a "test rom" which tests instructions to see which work |
Over the past week I started one last big project in my spree to test out what I can do these past few months. As seen in the above screenshot, I've been working on a Game Boy emulator! As with my past projects, the only dependency is SFML which I use for rendering (I'm thinking about splitting up the project into two to remove the SFML dependency, since the SFML code is literally a few dozen lines).
The project has been pretty smooth so far and I'm able to run very basic ROMs but am still a ways off from running full fledged games. Probably the most difficult part of setting up the emulator is that you need quite a lot already established to run even the most basic ROMs, and on top of that I had to manually implement over 400 instructions for the modified Z80 processor being emulated, which took 3 days of grunt coding to finish. Thankfully, I was able to use Imran Nazar's jsGB emulator as a base off which I implemented the instructions. Unfortunately, while a good reference, I had to use another reference to go over every instruction and correct mistakes I found, which were quite a few and a bit frustrating (and I'm still not sure I caught all the mistakes).
At least for me, it's almost guaranteed that writing hundreds of instructions will result in some typos and mistakes, which is where test roms come into play. Thankfully, there exists an entire suite of test ROMs that test all the instructions and features of the Game Boy to see if it is compliant. I've been using the BGB emulator's debugger as a base to compare my emulator to. I go through each instruction and make sure they, and the registers, match BGB's.
On GitHub there is a private repository for this project setup, and hopefully in the next few weeks I can make it public. This project really takes me back because the Game Boy is my all time favorite console, and it's really fun to be able to implement my own take on it.
Saturday, June 6, 2015
New Library: SerializeQueue
Recently I completed the first draft of a new header only C++14 library I've been working: "SerializeQueue". The basic idea is that you push all your values onto the queue, serialize it to a binary file, then later load and deserialize the binary file back into a queue to pop data off of.
Github (project page): https://github.com/Salgat/SerializeQueue
Github (project page): https://github.com/Salgat/SerializeQueue
This library has been especially fun because I've had a chance to delve into several programming tricks I wasn't familiar with before. The first and most basic is a method for converting a binary value into the specific type to be returned. SerializeQueue supports T pop< T >(), which, using type information, pulls the top information off the binary file and converts it to the type given. To prevent any compiler intervention, the binary is loaded directly into a uint64_t variable and then the following is done,
What this does is it takes the address of the variable, treats it as a pointer, then tells the compiler to treat that pointer as a pointer to a different type before dereferencing it.
The next "trick" I had to use was something called tag-dispatching. The purpose behind tag dispatching is that, for ambiguous cases, you create a way for the compiler to distinguish between two different overloads. Below is an example,
These functions are inline, and the tag itself is just an empty struct, so it ends up being optimized out of the program which eliminates the overhead of the tag. The basic idea behind this, for cases of std::vector, is that a special overload exists that accepts a tag of std::vector among other types specialized for.
The last and current problem I'm working on is implementing tuples. Tuples are difficult because it is a container that holds multiple data types, and requires template metaprogramming to implement. I just started reading Modern C++ Design to try to get a better grasp on this new programming method, but it's definitely a wall that I've hit with what I can do. Hopefully I can come back and flesh out the tuple implementation once I learn more about how to deal with generics. For now this library only supports tuples of basic types.
The next "trick" I had to use was something called tag-dispatching. The purpose behind tag dispatching is that, for ambiguous cases, you create a way for the compiler to distinguish between two different overloads. Below is an example,
These functions are inline, and the tag itself is just an empty struct, so it ends up being optimized out of the program which eliminates the overhead of the tag. The basic idea behind this, for cases of std::vector
Tuesday, June 2, 2015
Game Release: BubbleGrow
 |
| Main Menu |
After a month of development, BubbleGrow is finally ready to be released as open source. BubbleGrow is a simple game whose gameplay revolves around building an army of bubbles to gather resources and fight against other players, with the winner being the last man standing.
Github (project page): https://github.com/Salgat/BubbleGrow
Documentation (wiki): https://github.com/Salgat/BubbleGrow/wiki
Download (64 bit): https://github.com/Salgat/BubbleGrow/raw/master/BubbleGrow-V0.1-Windows-x64.zip
BubbleGrow's only dependency is SFML, which, along with only using the standard library, makes this game cross-platform across Windows, Linux, and OS X. It's been tested on both 32 and 64 bit platforms with no performance issues (even ran it on an old dual core Pentium from 2007 with embedded graphics). BubbleGrow takes advantage of OpenMP to support multithreading up to as many cores as you can give it (assuming you have up to 1 thread per player, or up to 16 threads for default gameplay). The beauty of OpenMP is that it won't prevent compilation on compilers that do not support it, since it only uses preprocessor pragmas which can be ignored.
 |
| Gameplay: Two players battling each other |
This game is almost completely licensed under the MIT license, with the only exception being the audio and font, which have their own licensing. The source code is completely open and free to modify, and for anyone who chooses to use the source code, they can do it without any requirements as long as they do not redistribute the source code without the MIT license.
Saturday, May 23, 2015
Enumeration Iterator Library (EnumIt)
In the new game I'm making, I've been using enumerations along with constant arrays for some quick configurations and needed a quicker way to iterate through all available enumerations (for example, when loading images who are identified by their enum class value). I created an enum iterator library (EnumIt) which is a single header file. It comes with functions to get an enum's Begin and End iterator and also provides an interface which supports ranged-based for loops. Although very simple, hopefully it will be helpful to someone else. Below is an example which can be found on the github page: https://github.com/Salgat/Enum-Iterator
 #include <iostream>
 #include <string>

 #include "enumit.hpp"

 enum class SampleId {
   FIRST,
   SECOND,
   THIRD
 };

 /*
 enum SampleId {
   FIRST,
   SECOND,
   THIRD
 };*/

 int main() {
   for (auto iter = enumit::Begin<SampleId>(); iter != enumit::End<SampleId>(SampleId::THIRD); ++iter) {
     SampleId entry = *iter;
     std::cout << "Current SampleId: " << static_cast<int>(entry) << std::endl;
   }

   for (auto entry : enumit::Iterate<SampleId>(SampleId::THIRD)) {
     std::cout << "Current SampleId: " << static_cast<int>(entry) << std::endl;
   }

   return 0;
 }
Tuesday, May 19, 2015
New Project: BubbleGrow
 |
| In game screenshot |
A couple weeks ago I decided to do one more project before going back to developing my other game. From the above screenshot, you can see a preview of the game, titled "BubbleGrow". The basic idea is that you collect resources (green bubbles), purchase and upgrade your bubbles, travel around the map, and fight other players (such as you (red) fighting the computer (teal) in the above screenshot). The arrow indicators on the edges of the window show where other players are.
The goal for this game isn't so much being fun or for selling, but as a free and open-source project for learning. I've been using GitHub for revision control. I've kept the external dependencies to a minimum (only SFML at this point) and licensed everything (including the artwork I made) under the MIT license, so that anyone can use anything from this project for whatever they wish.
 |
| Mock-up main menu (only Quick Match games are currently supported) |
The game is structured in a simple manner, is well commented, and is designed to be easy to dive into. To break it down quickly, there exists a "World" class that holds all players, a "Player" class that holds the state of each player, and a "Unit" class that holds the state of each bubble. There is a single subclass ("Resources") that is a specialization of the "Player" class in that it handles those green resource bubbles that the players can mine for purchasing units. The only other class is a "Renderer" class that handles the display and input. I plan to expand the "Renderer" class since it's approaching over 500 lines of code and has way too much scope. A few additional classes are needed to handle sound and batch drawing.
As a learning resource (which is the whole point of making this open source) I hope this project allows people the chance to learn how to download and setup a build environment for a medium sized project. I plan to heavily document instructions for new programmers to be able to build and modify the game. As of now, all that's needed to build BubbleGrow are the library and include files downloaded from the SFML website, CMake, Make.exe, and MinGW.
 |
| The different bubble types you can purchase and upgrade to |
Additionally, with the way the program is structured, it should be easier for newer programmers to dive right in and start changing things. The entire game state is focused around 3 major functions, "Update" which updates the unit's health and other stats, "MakeDecision", where each unit has a view of the game state and submits a Request for processing, and "ProcessRequest", where the Unit executes either its current action (such as finishing an attack) or starts a new action based on the Request (decision) it just made.
Finally, as a bonus, this game supports multithreading using OpenMP, which is awesome because it is both cross-platform and compiler safe (since OpenMP uses pragma compiler directives which will simply be ignored if not supported) and because this is accomplished without using any threading libraries. While it would have been nice to use a concurrent container from a library like Threading Building Blocks, by following certain rules (such as only calling const methods on containers that don't modify the internal state of the container) and setting only a few variables to atomic, thread-safety is maintained.
Anyways, progress is rapidly underway and I hope to finish it in the next couple weeks. It's certainly a fun personal project and hopefully will be helpful to others!
Saturday, April 25, 2015
Using Python's PIL library to remove "green screen" background.
 from PIL import Image
 from PIL import ImageFilter
 import os
 for filename in os.listdir("."): # parse through file list in the current directory
      if filename[-3:] == "png":
           img = Image.open(filename)
           img = img.convert("RGBA")
           pixdata = img.load()
           for y in xrange(img.size[1]):
                for x in xrange(img.size[0]):
                     r, g, b, a = img.getpixel((x, y))
                     if (r < 130) and (g < 60) and (b < 60):
                          pixdata[x, y] = (255, 255, 255, 0)
                     #Remove anti-aliasing outline of body.
                     if r == 0 and g == 0 and b == 0:
                          pixdata[x, y] = (255, 255, 255, 0)
           img2 = img.filter(ImageFilter.GaussianBlur(radius=1))
           img2.save(filename, "PNG")
The basic idea is to load each frame of the animation, loop through each pixel of each frame, and remove the color of the "green screen" background color, including a small range to account for the semi-transparent pixels on the edge of the rendered object that are mixed with the green screen. Finally, a small blurring filter is added to soften the edges of the image, otherwise at the edge where the green screen is removed, it looks more obvious that it was "cut out". As a final touch, after creating the sprite sheet you can use a program like GIMP to add some additional filters to adjust the color and contrast. You can also use GIMP to get the exact RGBA numbers to specify which color to filter out in your program.
Wednesday, April 22, 2015
Concurrent Map
Before moving on, I decided to add one more concurrent container to the library I mentioned in my last post. Stack and queue are relatively primitive in that they are a singly linked list of data with either one or two pointers held by the class. Operations such as push and pop can be simplified to just changing the head or tail of the data structure. I really wanted to do one more that is an especially useful data structure so I wrote a pretty basic implementation of std::map but concurrent.
The concurrent map was implemented using a combination of buckets for a very small and basic hash, and then for any collisions in these buckets were stored in a balanced binary tree (AVL, which is contrary to the STL's red-black tree implementation). A simple hash was used because it allowed me to partition the values into "thread-safe zones" that I could wrap a mutex around. It's a pretty naive/basic way of adding concurrency to a map compared to more advanced lock and wait-free methods but it does work.
At this point I'm very anxious to get back to programming for my game and have already started reading a new book on ZeroMQ, which is a very robust library for handling many network connections in a simplified manner. I'm not sure if this is the library I will end up using for networking in the game, but it's extremely interesting none-the-less and I look forward to learning more about it.
Anyways, for those interested in checking out the source for the new concurrent map, check it out at: https://github.com/Salgat/Concurrent-Containers-Library/blob/master/containers/map.hpp
Friday, April 17, 2015
Concurrent Data Structures
For the past 6 weeks I've been on a different schedule due to training at work that has unfortunately restricted much of my time that can be devoted towards programming. Although I've been busy with work, that doesn't mean I haven't had any free time left! On my days off I've been studying concurrency in a much more in-depth manner and even wrote a basic concurrent data structures library. It's published on github and supports a concurrent stack, queue, and a third data structure similar to stack and queue (in that it supports push and pop) but the pop order is not guaranteed (it must be assumed that the pop order can be random).
For the concurrent stack and queue, I used a technique called "Flat-Combining" to maintain thread-safety when accessing the containers. The idea behind flat-combining is that each thread gets access to a special record that they can publish their desired action to. They then wait for a response on that record indicating that the action has been processed on the data structure. A global lock exists that limits only 1 thread to be able to process the requests of the other threads. If the lock is available, any thread that is waiting for a response will try to take the lock and take it upon themselves to publish the actions of all the threads to the data structure. I found this data structure to not only be more performant but also much easier to implement compared to a traditional lock-free data structure.
For the last data structure (which I called "data_pool" since I'm not sure what the right name is for it), it is what I consider more concurrent friendly because it compromises by allowing any order for data popping. Data is stored in vectors of successively growing size (larger vectors are added as more data is pushed to an already full data structure), which helps with spatial locality, and since the the same vectors are used repeatedly, temporal locality is improved (instead of allocating a new node on the heap every time a value is pushed).
If interested in checking out the source code and some examples, the project's page can be found at: https://github.com/Salgat/Concurrent-Containers-Library. It should be noted that these are naive implementations and are neither guaranteed nor fully tested.
 #include "ccl.hpp"
 #include <iostream>

 int main() {
   std::cout << "Starting concurrent data pool test" << std::endl;
   ccl::data_pool<std::string> pool;

   pool.push("Hello!");

   std::string popped_value = "Empty";
   if(pool.try_pop(popped_value)) {
     std::cout << "Popped value: " << popped_value << std::endl;
   } else {
     std::cout << "Value did not pop, variable is still: " << popped_value << std::endl;
   }
 }
For the concurrent stack and queue, I used a technique called "Flat-Combining" to maintain thread-safety when accessing the containers. The idea behind flat-combining is that each thread gets access to a special record that they can publish their desired action to. They then wait for a response on that record indicating that the action has been processed on the data structure. A global lock exists that limits only 1 thread to be able to process the requests of the other threads. If the lock is available, any thread that is waiting for a response will try to take the lock and take it upon themselves to publish the actions of all the threads to the data structure. I found this data structure to not only be more performant but also much easier to implement compared to a traditional lock-free data structure.
For the last data structure (which I called "data_pool" since I'm not sure what the right name is for it), it is what I consider more concurrent friendly because it compromises by allowing any order for data popping. Data is stored in vectors of successively growing size (larger vectors are added as more data is pushed to an already full data structure), which helps with spatial locality, and since the the same vectors are used repeatedly, temporal locality is improved (instead of allocating a new node on the heap every time a value is pushed).
If interested in checking out the source code and some examples, the project's page can be found at: https://github.com/Salgat/Concurrent-Containers-Library. It should be noted that these are naive implementations and are neither guaranteed nor fully tested.
Wednesday, March 18, 2015
Feature Update - Audio
Since the beginning there have been a few major features to implement I've been a bit intimidated by. Recently map generation has been added which took a solid week to implement in my spare time and still requires more work (such as adding enemies, portals, and decorations). With that out of the way, two other features were left that I am completely unfamiliar with: audio and networking. Thankfully this past weekend it has been implemented. Creatures now make sounds as they attack, die, cast spells, run, etc, and music accompanies each level. I'm not sure if I just got lucky, but the visual client is setup in a way that already detects transitions in unit actions (for the purpose of changing the animations) which also makes it very easy to associate sounds with. Before going into an explanation, check out the below video to see a demo of audio in the game.
SFML includes a great audio API that makes loading and playing sounds very easy. First, you load all the sounds you want into "sound buffers", which the game holds in a map, then a sound object is created and has a sound buffer assigned to it, allowing it to play that sound. The game limits sound objects to 256 simultaneous sounds that can play. To manage this, the game creates a vector of 256 sounds, and manages which sound objects are in use. When a sound object is no longer in use, it becomes available for the next audio to play (this includes changing which sound buffer is assigned to it).
A concurrent queue is used that holds all new actions occurring, and once per frame it polls through the queue and plays all sounds associated with the actions. This keeps the whole process thread safe, while allowing for concurrency in the parts of the program that concurrently execute multiple actions (otherwise you'd have multiple threads trying to play sounds at the same time in an unsafe manner).
The final piece of the puzzle for implementing sounds in the game is how to assign all these actions to specific sound files. A configuration file is used to assign all of this. Below is the current configuration file used. To note, a safeguard exists to make sure actions with no corresponding sound simply play nothing.
As of now, there a few things left to implement. First, the game will have no problem loading the same sound file twice for different actions instead of just re-using the same loaded file. This needs to be addressed. Secondly, all sounds are played at the same volume. SFML supports positional audio, and this will be added so that distant sounds are quieter and also their direction will be accounted for. Finally, while it's already programmed into the game to have both a master volume, and volume for music and other audio types, it needs to be added to the interface.
As a final note, most of the audio used is taken from free websites like http://www.freesfx.co.uk/ and modified using Audacity. I'll admit that I have next to no experience with audio, but my background in electrical engineering and my internship with Visteon in the audio department (working on electronics like amplifiers) does make things a lot easier. For example, the sound of the bird monsters attacking and dying in the video was originally from an elephant sound clip that was heavily processed.
SFML includes a great audio API that makes loading and playing sounds very easy. First, you load all the sounds you want into "sound buffers", which the game holds in a map, then a sound object is created and has a sound buffer assigned to it, allowing it to play that sound. The game limits sound objects to 256 simultaneous sounds that can play. To manage this, the game creates a vector of 256 sounds, and manages which sound objects are in use. When a sound object is no longer in use, it becomes available for the next audio to play (this includes changing which sound buffer is assigned to it).
A concurrent queue is used that holds all new actions occurring, and once per frame it polls through the queue and plays all sounds associated with the actions. This keeps the whole process thread safe, while allowing for concurrency in the parts of the program that concurrently execute multiple actions (otherwise you'd have multiple threads trying to play sounds at the same time in an unsafe manner).
The final piece of the puzzle for implementing sounds in the game is how to assign all these actions to specific sound files. A configuration file is used to assign all of this. Below is the current configuration file used. To note, a safeguard exists to make sure actions with no corresponding sound simply play nothing.
 # Player
 Player_Run_Default_0=Player/Actions/running.ogg
 Player_Swing_Sword=Player/Actions/sword_swing.ogg
 Player_Hit_Sword=Player/Actions/sword_hit.ogg
 # Skywatch
 Skywatch_Die_Default=Creature/Actions/skywatch_death.ogg
 Skywatch_Swing_Default=Creature/Actions/skywatch_swing.ogg
 # Skeleton
 skeleton_Die_Default=Creature/Actions/skeleton_death.ogg
 skeleton_Swing_Default=Player/Actions/sword_swing.ogg
 skeleton_Hit_Sword=Player/Actions/sword_hit.ogg
 # Spells
 fireball_Die_Default=Player/Spells/fireball_death.ogg
 fireball_Cast_Default=Player/Spells/fireball_cast.ogg
 teleport_Cast_Default=Player/Spells/teleport_cast.ogg
 summon_Cast_Default=Player/Spells/summon_cast.ogg
 # Miscellaneous
 Default_Waypoint_Default=Player/Actions/waypoint.ogg
 # Music
 town=Music/OnlyIf-WhitePawn-5-Infinity.ogg
 town2=Music/OnlyIf-WhitePawn-5-Infinity.ogg
 test_map=Music/OnlyIf-Intro-2-MeetingVinny.ogg
As of now, there a few things left to implement. First, the game will have no problem loading the same sound file twice for different actions instead of just re-using the same loaded file. This needs to be addressed. Secondly, all sounds are played at the same volume. SFML supports positional audio, and this will be added so that distant sounds are quieter and also their direction will be accounted for. Finally, while it's already programmed into the game to have both a master volume, and volume for music and other audio types, it needs to be added to the interface.
As a final note, most of the audio used is taken from free websites like http://www.freesfx.co.uk/ and modified using Audacity. I'll admit that I have next to no experience with audio, but my background in electrical engineering and my internship with Visteon in the audio department (working on electronics like amplifiers) does make things a lot easier. For example, the sound of the bird monsters attacking and dying in the video was originally from an elephant sound clip that was heavily processed.
Monday, March 9, 2015
First Stages - Map Generation
 |
| A player and his minion in a procedurally generated map. |
The above picture shows a preview of the procedural map generation implemented in the game. The algorithms used are outlined in a blog post by Bob Nystrom. The basic idea is that you provide a few simple parameters like map dimensions, maximum number of rooms, and so on, and then the generator goes through a couple stages to come up with what you see in the above screenshot.
To summarize:
- Randomly place rooms of varying sizes within the map dimensions (up to the amount provided). Don't add any rooms that would overlap.
- Fill in the remaining empty space (not occupied by rooms) with mazes.
- Go through and randomly add doors between mazes and rooms until all mazes and rooms are connected.
- Remove maze dead ends.
- Scale the maps by a certain amount (otherwise hallways for example are only 1 tile wide).
- Create a new map using the scaled map to designate specific sprites. The scaled map only has 4 tile types specified: empty, floor, wall, and door tiles, while the total sprites used are over 10. The new map determines things like which wall corner sprites to use among other details.
In the above video (and screenshot), you can also see one more feature added. As the player goes behind walls, they fade out so you can see through them. As soon as you walk in front of the wall, it goes back to fully visible. This effect was copied from the Diablo series. The algorithm used basically scans the tiles below the player, and if it finds a wall (either along the x or y-axis), it goes along the wall in both directions along the same axis and fades it out. This way you never have an issue seeing as you are fighting behind a wall.
Saturday, February 21, 2015
Questing Implemented
 |
| A quest given by the skeleton NPC, with options to either steal or lie to him (optional). As a twist, forcing him to give you the reward results in him giving you a severely crippled version of the reward. |
The first version of questing is finally in the game. This initial version allows for item rewards, quest requirements to kill certain units or a certain amount, and having you go to certain areas. Additionally, it allows for multiple stages of dialogue with an NPC that include responses you can say to the NPC to control how he responds.
From the above video, the entire quest is shown, starting with him stating the requirements (and giving a few optional responses to choose from) and killing the 5 monsters to get your reward. The questing system is similar to how the Elder Scrolls series does questing, in that you have "stages" that represent progression of a quest. Certain actions result in progression to different stages, sometimes skipping around stages, and some stages have requirements while others don't.
For those curious, below is the script used for this quest. I unfortunately don't have the time to make the script that versatile, so you have to follow a pretty strict format for writing them, including no random spaces, or multi-line statements. The script is commented enough to give you an idea of how it all works. It should be noted that these scripts are tied to a specific unit (although more than one unit can be configured with the same dialogue script), and a unit is configured simply by setting unit->dialogue = Dialogue["ScriptName"]
 # Kill 5 Skywatch for a reward (a very powerful sword).

 #-------------------------------------------------------------------------------
 # This part outlines what is required for each stage (starts at 1)
 define stage_requirements 1
 # This requirement is to kill 5 units with the display_name "Skywatch"
 type=KILL_UNIT_TYPE
 # For vector based values, pushes back each entry
 unsigned_int_data=5
 string_data=Skywatch
 end_requirement

 # Below is an example of a unit->dialogue_information[string_data] requirement, which in this case requires either
 # a value of 1 or 2 to qualify for the requirement.
 #type=VARIABLE
 #string_data=Skywatch_Quest_Complete
 #unsigned_int_data=1
 #unsigned_int_data=2
 #end_requirement

 end_define
 #-------------------------------------------------------------------------------

 #-------------------------------------------------------------------------------
 # This part tells the script to create an equipment with the script identifier "Sword_Reward"
 define item Sword_Reward
 type=WEAPON
 creator_id=0
 owner_id=0
 name=Sword Reward
 inventory_sprite=Sword
 size=1,3
 sprite=longsword
 base_attack_damage=200,400
 attack_range=0.8
 attack_rate=3.0
 speed_modifier=1.0
 end_define
 #-------------------------------------------------------------------------------

 #-------------------------------------------------------------------------------
 define item Sword_Bad_Reward
 type=WEAPON
 creator_id=0
 owner_id=0
 name=Sword Reward
 inventory_sprite=Sword
 size=1,3
 sprite=longsword
 base_attack_damage=1,2
 attack_range=0.8
 attack_rate=0.5
 speed_modifier=1.0
 end_define
 #-------------------------------------------------------------------------------


 # Stage 0 - Quest statement
 type@0=STATEMENT
 statement@0=Please kill 5 Skywatch. Once you have killed 5, come back and I'll give you a great reward. It's pretty awesome...
 action@0=NOTHING
 next_stage@0=1

 # Define options available for stage 0
 # The option order is preserved, the number after @ represents what stage to go to when it is selected, and the string is what to show.
 define options 0
 option@3="Just give me the item or I'll kill you."
 option@1=Lie and say you killed them already.
 end_define

 # Stage 1 - The reward (good job, ya dingus!)
 # A stage that gives items will typically only show the reward message once unless you loop back into itself and
 # have an option that changes the stage (such as "okay"). Also a give items stage won't reward items twice
 # even if it is active multiple times. For repeatable quests, could add a way to keep giving rewards?
 type@1=STATEMENT
 statement@1=Thank you! You killed five Skywatch. Here's your reward, a sword. It's pretty good, I promise!
 # This sets items_to_give[1] = std::shared_ptr<Equipment> Sword_Reward, defined above
 items_to_give@1=Sword_Reward
 action@1=GIVE_ITEMS
 next_stage@1=2

 type@2=STATEMENT
 statement@2=Well uh, hope you like it, like I said, it's really strong! Right...?
 action@2=NOTHING
 set_variable@2=Skywatch_Quest_Complete=1
 # For a stage with no requirements, it will automatically progress unless you have the next_stage direction
 # back to itself. This is useful if doing something like an options menu, where you manually go to the next stage,
 # or if this is the last stage.
 next_stage@2=2

 type@3=STATEMENT
 statement@3=Okay okay! Here, take it. It's not that good...please don't be angry.
 items_to_give@3=Sword_Bad_Reward
 action@3=GIVE_ITEMS
 set_variable@3=Skywatch_Quest_Complete=2
 next_stage@3=4

 type@4=STATEMENT
 statement@4=I hope it was worth stealing...
 action@4=NOTHING
 next_stage@4=4
Monday, February 16, 2015
Feature Update - 2/16/2015
As an update on the development of the game, here are a list of features that have been updated/added since the last feature update a month ago,
Previously, I used a simple Python script I wrote that compiled the game and detected changes to files to know which files to rebuild. While it worked great and was really fast to setup, I needed a more robust system since the project is starting to reach a point where features like a dependency tracker, that determines what to rebuild when a header file changes, are faster than just rebuilding the entire project. Also, it should be noted that you never want to re-invent the wheel if it can be helped. After following the excellent Cmake tutorial by written by John Lamp, I was able to setup Cmake and start using Make for my project. Sadly it has slowed down build times on the dinosaur I use for 32-bit testing, but it works none-the-less!
- Experience and leveling
- Killing a unit gives experience and, after enough experience, a new level and skill points
- Interface
- Player health and energy bars
- Enemy health bar (if targeted)
- Inventory and equipped items
- Items
- Can now use interface to equip and unequip items
- Able to put items in inventory
- Drop items on ground, and pick up items on the ground
- Multiple map support
- Units are now able to travel to other maps
- Rudimentary quest support (work in progress)
- As of now all kills are tracked. Additionally, working on support for quests (that are loaded from scripts). Current quests allow for dialogue with options, giving items as quest rewards, and quest requirements including killing a specific unique unit, killing a certain number of a type of unit, and entering a certain area (a quest can have multiple requirements).
- Save and load game state
- Able to save and load game states using either hot keys or the menu, restoring the game to whatever state it was saved at.
- Basic Menu (work in progress)
- Able to pull up a menu to save and exit the game; working on adding options such as changing resolution or hotkeys.
- Building using CMake
- This is internal, but previously I was using a custom script to quickly compile the game, however finally added support for CMake to automatically create Makefiles to build the game. This way is more robust but unfortunately the dependancy tracker is *really* slow when building on the older computer (for building and testing on the 32-bit computer from 2008, it takes a good 5 minutes to build versus 2 minutes on my newer desktop. The previous script to build took much less time since it didn't use a dependency tracker (it would rebuild whatever was changed, but you had to run -clean if headers were changed).
 |
| Killing several monsters has rewarded enough experience to reach level 4. (Click the image to read the stats in the top left corner). Additionally, the player's health and energy bars, and the targeted enemy health bar is visible. |
As a quick recap of all the new features, the first is the addition of experience. Using Excel an algorithm for determining leveling was created. Two factors had to be addressed: as you level up, it becomes harder to level, and lower level creatures reward less experience that drops off at an exponential rate. As of now there is no plan for a level cap, but at around level 80 it starts to take a lot longer to level, and at level 99 it takes roughly 25,000 unit kills to level up. The idea is to create a "soft-cap" on leveling, so that while you are free to level as much as you want, it becomes incredibly difficult to do (to the point of not being practical for the reward it gives).
 |
| The inventory and equipped items shown. Next to the player can be seen a dropped item (filler sprite) and if you notice, the player is not wearing his armor (which, due to not having a default armor sprite yet, results in an "invisible" body). |
A new interface has been created that shows both the player's health, energy, enemy health (if targeted), and the inventory/equipped items. The inventory supports equipping and unequipping items, along with picking up and dropping items. Due to my lack of painting skills, I resorted to developing the interfaces in Blender and using the 3D renders to develop the interface graphics.
If you look at the above picture, you can see a portal near the player. A new type of unit called "Portals" are now supported that allow a player to travel to different maps by clicking on it. When changing maps, a unit's minions automatically travel with it.
If you look at the above picture, you can see a portal near the player. A new type of unit called "Portals" are now supported that allow a player to travel to different maps by clicking on it. When changing maps, a unit's minions automatically travel with it.
An important addition was made to the Unit class that allowed tracking of stats such as which type of units were killed, the unique ID of all monsters killed, and areas entered. This, along with a new quest system in the works, allows for players to complete tasks such as killing a unique boss or even something like the "Den of Evil" quest from Diablo 2, where you had to clear out an entire map of enemy units.
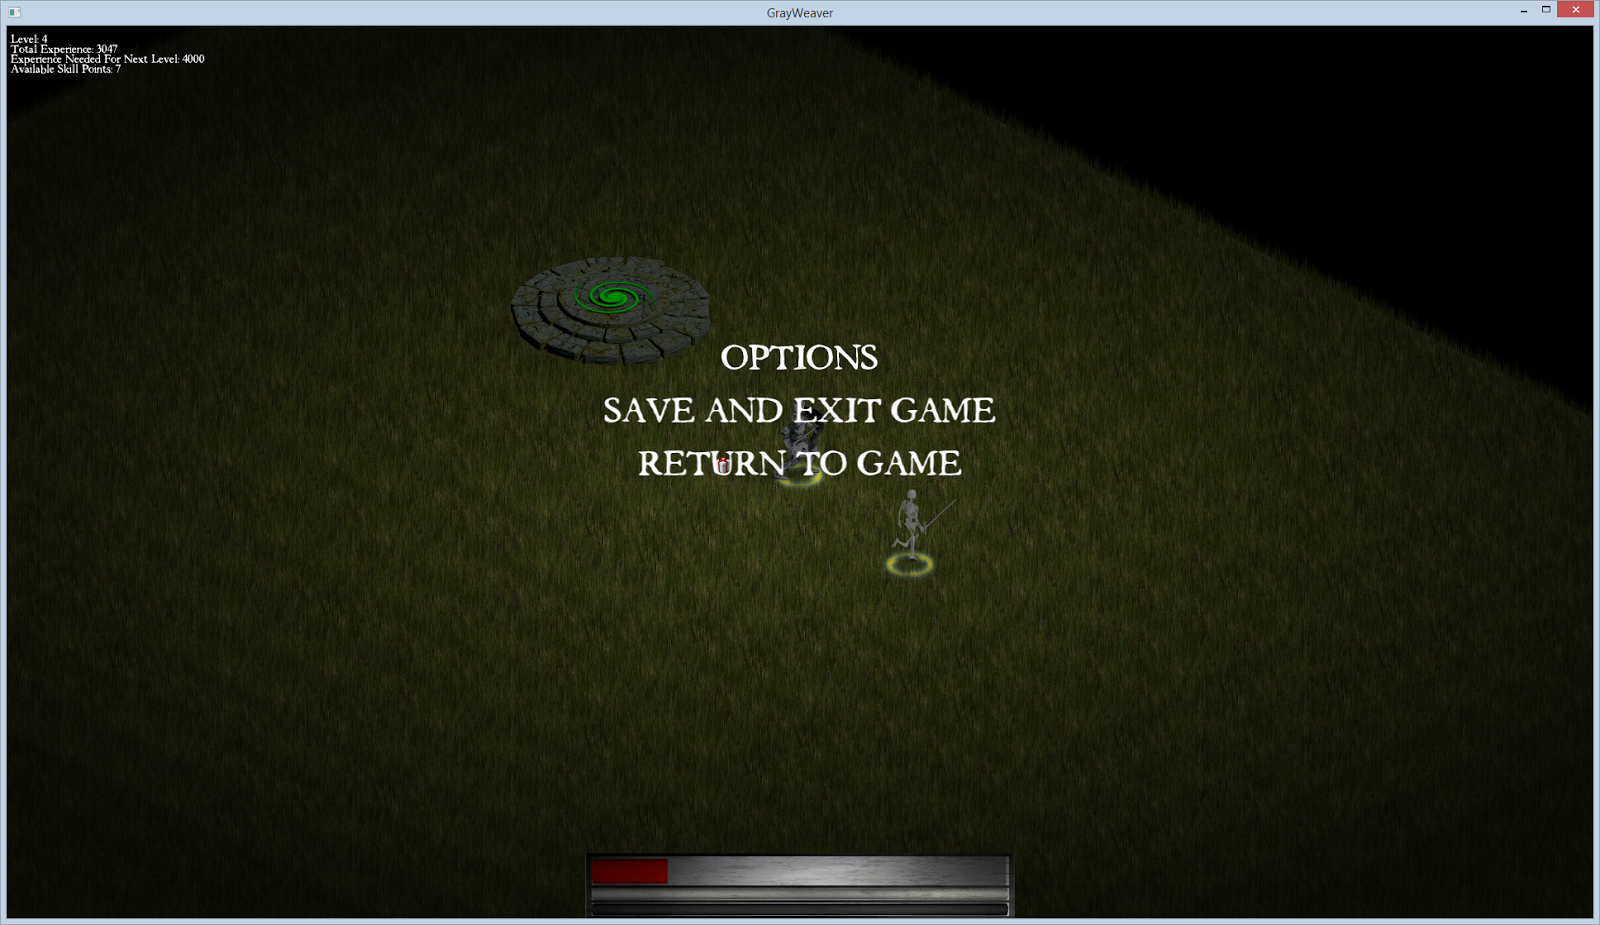 |
| The main menu (accessed when pressing the Escape key). |
The menu system is still very rudimentary, with only support for saving and exiting the game. Saving the game state posed an interesting problem because there are many ways to approach this problem. In games like Diablo 2, you simply save the player character's stats and progression and reload all the maps, etc from a clean slate. Since it's easy to do (at least for now), I decided to just save everything exactly as it is, so that when you save the game then load it later, it loads *exactly* as it was when you saved it, including the location of all enemies and their current state, along with your own minions. Saving the game utilized the Protocol Buffers library from Google, which allows you to define a special "Proto" file that defines the data structures you want to save to and serialize. You then compile this Proto file into a C++ file and header that can be included in your program. From there, you create a data structure (defined in the Proto file), store the relevant data to it, then serialize it. Later you simply load that serialized file into a ProtoBuf structure, and read the relevant data from it to reconstruct your game's entities.
 |
| CMake support added for building the game. |
Previously, I used a simple Python script I wrote that compiled the game and detected changes to files to know which files to rebuild. While it worked great and was really fast to setup, I needed a more robust system since the project is starting to reach a point where features like a dependency tracker, that determines what to rebuild when a header file changes, are faster than just rebuilding the entire project. Also, it should be noted that you never want to re-invent the wheel if it can be helped. After following the excellent Cmake tutorial by written by John Lamp, I was able to setup Cmake and start using Make for my project. Sadly it has slowed down build times on the dinosaur I use for 32-bit testing, but it works none-the-less!
All these features are starting to add up to a good foundation for the game. There are still a lot of features and other additions left to be added before this game is worthy of something like a demo, but at least it's progressing!
Friday, February 6, 2015
Parallelizing the game
From the beginning, the development of the game has had concurrency in mind, with the intent of not only taking advantage of more cores but also increasing the responsiveness of the game. The following is an overview of the architecture of the game and how it takes advantage of task parallelism to fully utilize multi-core processors.


It should be noted that when dealing with multiple cores, cache coherency plays a very large role in the performance of each thread. The overhead of a single mutex can be well over 100 cpu cycles, which makes them expensive operations to perform. Additionally, false sharing, where two cores are actively writing and reading to the same cache line (even if it's two separate variables), can delay each thread sharing cache lines by over 100 cpu cycles each time false sharing occurs, due to needing to constantly update their caches.
The good news is that for the models used by the game, these issues are mostly avoided. For the Producer-Consumer model, a temporary "buffer" of data is created (as noted previously) that is read-only and only used by the consumer thread. This buffer is only protected by a mutex once every 50mS which is a negligible overhead and since no data is written to it once it is created, false sharing will not occur. Also, for the consumer (the client), only a try_lock() is used once every frame (and only if a new buffer is available), so it will never face blocking due to the mutex being locked by the game state. As far as the game state blocking, the client will only lock the mutex for a very short time (long enough to copy a vector of ~100 shared pointers), which combined with the fact that the mutex is only acquired by the game state every 50mS results in both a very low chance of blocking and even then a block only consists of a few hundred cycles every 50mS which is negligible. While you'd normally want to avoid any blocking between a producer and the consumer (using something like a queue or double buffer), the negligible amount of blocking that does occur is more than sufficient with just using a mutex.
For the second means of parallelism, the "Actor Model", two of the three stages used have minimal cache coherency performance issues. The first stage, updating each Unit's stats, limits each thread to only modifying its own Unit. No data is shared between two threads, so no false sharing occurs. Additionally, this allows each Unit to modify data without needing mutexes. For the second stage, the AI, the game state is in a read only mode, which again produces no issues of cache coherency or false sharing. The final stage, each Unit executing its action, is the only case where performance can be an issue. Although no mutexes are used, atomic operations are used which can create similar performance issues (although they are typically faster). The good news is that due to the nature of the requests being handled, most of time units are only handling their own data (such as walking, which only affects a Unit's own variables), which helps to minimize the chance of two threads sharing the same cache line.

The producer handles game logic and the state of the game, while the consumer displays the information for the player.
The game is divided into two parts: the game state, which handles both the game's current state and logic, and the client, which produces the graphics and submits input to the game state. This design pattern is called "Producer-Consumer" and poses a few issues with regard to thread-safety.
The producer, the game state, runs stand-alone and for the most part is unaware of the graphical client. The game state's job is to handle all the logic and maintain the current state of what is happening. It runs the AI, physics, health, damage, etc in the game. The client on the other hand, depends wholly on the game state in order to display all the information about the game. Now, the easiest way for the client to get data from the game state is to simply read all the public variables exposed by the game state and use that information. The issue comes when the game state starts updating variables, breaking valid data structures temporarily and becoming thread-unsafe. To avoid this issue, the game state does two things.
First, the game state, after updating, gathers all information that may be useful to the graphical client, and creates a data structure containing this information. This information is wrapped in a mutex while being updated so that it is always thread-safe to read from. The graphical client each frame update sees if the mutex is free, and if so, copies over the shared pointers to the data structures that the game state has provided, and then releases the mutex again. The game state creates new objects under different shared pointers every update, so that the graphical client never has to worry about thread-safety with the objects it has references to. Additionally, once the client is done with the objects, they will automatically destruct when the client reads in the new shared pointers from the game state.
The second method for safely reading data from the game state is the use of atomic types for most of the basic information held by the game state. Every now and then the client needs to read information about the game state that isn't normally available, so it atomically reads whatever variables it needs to from the game state. Only one assumption is made about the game state: the game state could be changing that variable at any time. This means that if something like position is being changed, you may end up with the x coordinate being from the last update and the y coordinate being from the current updated cycle. Thankfully these cases are rare and are handled by the client just fine; especially since the next read will quickly correct the data. It should be noted that atomic types for most of the information is not necessary if the proper precautions are made. For this reason, using atomic types are much safer at the cost of a small performance hit.
So far, two threads have been covered (the producer, being the game state, and the consumer, being the graphical client). While this does allow for up to 2 cores to be utilized by the game, the scalability of the parallelism is still non-existent. This is where the second means to add parallelism exists.
The game state loosely utilizes something called the "Actor Model", which drastically increases the parallelism of the game. In the game state, almost everything is represented by a single class, the "Unit" class. This Unit class represents the player's character, the monsters, the portals, even the items you can pick up on the ground. Each Unit has variables that define its behavior, including Unit type (if it's an item on the ground or a unit that walks around), AI type (if it is a melee creature, or just an item that has no actions), etc. This Unit class represents the Actors in the game.
While having Actors is an important part of the Actor Model, it is useless without messages to send to the Actors to tell them what to do. A basic class called a "Request" class exists that controls the actions of all Actors. If you want to tell your character to run to a location, the graphical client will send a Request to the Unit to walk somewhere. If a monster's AI wants it to attack you, it will send an Attack Request. Since all these requests (the messages to the Units) are only processed once every cycle, all requests are added to a concurrent queue held by the game state to await processing the next cycle.
The Game State utilizes many actors that operate in parallel for each step in the Game State's update.
Here's where task parallelism kicks in and the program scales to as many cores as available. Every cycle, the game state steps through different stages to update the game. First, it determines the player's position and creates a list of every unit within a certain distance of the player (this is done for efficiency, since we don't need to update units in other maps or far away). Next, the first task parallelism kicks in and every Unit is updated concurrently. This update is fairly basic, and updates basic variables like determining if a Unit is dead, calculates its stats for the current cycle based on items equipped and auras, how much light it emits, energy regeneration, and so on. Since this update depends only on the Unit's own variables and no other, every Unit can be processed at the same time in a thread-safe manner.
Once all Unit's stats are updated, we move to the next parallelized task: the Unit's AI. As of now, every Unit's stats (including health and other stats like energy and speed) are already updated and available to be read. Each Unit's AI is called concurrently and every AI freely reads the game state to make a decision. Since no Unit is being updated or changed, all data being read is thread-safe. Once an AI is finished processing and has made a decision, it creates a Request (the message in the Actor Model), and submits that request to the game state for future processing.
At this point, every Unit's stats have been updated (including health and other stats), and every Unit's artificial intelligence has made its decision for this cycle. The final step is to carry out the actions of every Unit's AI. The game state filters all Requests in a very simple manner to make sure they are all valid (including limiting each Unit to only one Request per cycle), and then processes all the Requests concurrently. Each Unit has functions that handle every available Request type, and these are called along with the Request object to read all specific data (such as which Unit to attack or the direction to cast a fireball).
This is the part of the game state cycle that is thread-unsafe if not handled properly. For example, one Request may modify one variable that another Request is reading or also writing. There is also no guarantee on the order in which the Requests are processed. If for example, one Request is for a spell that halves the life of a Unit, while another spell does constant damage, the order in which each spell occurs changes the end result.
To resolve the issue with two Requests modifying and reading the same variable simultaneously, atomic types are used for any variable that may be modified by a Request being handled. Request handling limits all modifications to only modify atomic variables so that thread safety is maintained. For the second issue concerning the seemingly random order of Request handling, thread-safety is maintained regardless, and at a frequency of 20Hz (20 updates per second), issues with predictability caused by random request order are minimal. When networking is implemented, this will be something that will cause de-synchronization and will have to be accounted for when the clients regularly re-synchronize.
It should be noted that when dealing with multiple cores, cache coherency plays a very large role in the performance of each thread. The overhead of a single mutex can be well over 100 cpu cycles, which makes them expensive operations to perform. Additionally, false sharing, where two cores are actively writing and reading to the same cache line (even if it's two separate variables), can delay each thread sharing cache lines by over 100 cpu cycles each time false sharing occurs, due to needing to constantly update their caches.
The good news is that for the models used by the game, these issues are mostly avoided. For the Producer-Consumer model, a temporary "buffer" of data is created (as noted previously) that is read-only and only used by the consumer thread. This buffer is only protected by a mutex once every 50mS which is a negligible overhead and since no data is written to it once it is created, false sharing will not occur. Also, for the consumer (the client), only a try_lock() is used once every frame (and only if a new buffer is available), so it will never face blocking due to the mutex being locked by the game state. As far as the game state blocking, the client will only lock the mutex for a very short time (long enough to copy a vector of ~100 shared pointers), which combined with the fact that the mutex is only acquired by the game state every 50mS results in both a very low chance of blocking and even then a block only consists of a few hundred cycles every 50mS which is negligible. While you'd normally want to avoid any blocking between a producer and the consumer (using something like a queue or double buffer), the negligible amount of blocking that does occur is more than sufficient with just using a mutex.
For the second means of parallelism, the "Actor Model", two of the three stages used have minimal cache coherency performance issues. The first stage, updating each Unit's stats, limits each thread to only modifying its own Unit. No data is shared between two threads, so no false sharing occurs. Additionally, this allows each Unit to modify data without needing mutexes. For the second stage, the AI, the game state is in a read only mode, which again produces no issues of cache coherency or false sharing. The final stage, each Unit executing its action, is the only case where performance can be an issue. Although no mutexes are used, atomic operations are used which can create similar performance issues (although they are typically faster). The good news is that due to the nature of the requests being handled, most of time units are only handling their own data (such as walking, which only affects a Unit's own variables), which helps to minimize the chance of two threads sharing the same cache line.
Intel's parallelism library "Threading Building Blocks" provides both concurrent containers and parallel loops.
The three different parallelized tasks, updating the stats, making decisions with AI, and executing the decisions, all utilize the Threading Building Blocks library by Intel. Certain concurrent data structures (queues, hash maps, and vectors) from the TBB library are used along with parallel_for_each, which is what concurrently executes the tasks in an efficiently managed manner. Explicit std::thread's are used for the game state and the graphical client. The beauty of parallel_for_each is that it automatically manages a thread pool and manages how the tasks are spread across the thread pool to maximize performance while accounting for overhead involved with doing this. In an ideal environment with zero thread overhead, the game state could utilize as many cores as available on a computer, future proofing the game and enhancing performance as core count increases.
Sunday, January 18, 2015
Spellcasting, Auras, and Combat
A preview of some of the new features implemented.
Many different features have been worked on for the past few weeks, including a new model yet to be finished, but so far the above video gives a good idea of what is currently implemented in the game. The spells "Teleport", "Fireball", and "Summon Skeleton Minion" are demonstrated along with melee fighting, auras, and basic AI support.

The haste aura active on a warrior, surrounded by the dead bodies of both his minions and enemy monsters.
My plan now is to focus on traveling to different maps, dynamic map generation (think Diablo 1), and implementing more spells. Spell casting, now that the foundation is implemented, is pretty fast to add spells for. A typical spell written is around 50 lines of code. Auras are even less, with about 30 lines of code per aura. I've also been playing around with formulas for each spells.

The image used to texture the haste aura model (a simple textured plane with a 360 degree rotation animation rendered using an isometric perspective).
In the above video, you can see the "Haste Aura", which spreads to all allies within 15 meters and provides a certain percent faster run speed based on a given formula. The formula itself is,
Running Speed Multiplier = 1 + 0.2 * LOG(spell_level+1) + 0.003 * spell_levelThe logarithm is used to give the first 5-10 levels a sharp jump in speed increase, while the linear part provides a more constant increase in speed at higher levels (10+). I used Excel to give me an idea of the percent increases and tweaked the constant in front of the logarithm and the constant for the linear function to get the values I was happiest with.

A chart made in Excel showing how the multiplier for speed changes with level (from spell level 1 to spell level 40, and from a multiplier of ~5% to ~45%).
As can be see in the above graph, the speed multiplier has a small jump at the beginning before evening out.

A work in progress of a new model for the game.
Hopefully in my next post I can show a new model I've been working on. I'm going to probably add it as both a monster and a "form" or transformation that the player unit can become. Right now the difficulty is in texturing the model. It's very hard to do right, especially with low resolution and issues of low contrast making everything blur together. One of the tricks I applied to the bird model from earlier is to make the brightness of the model increase as it goes higher up the body, so that the head stands out the most (in the above picture, you can see this to some degree in the light chest and face area). Still a lot of work to do tweaking it and also getting the animations for it (it is rigged at least). Until next time!
Subscribe to:
Posts (Atom)